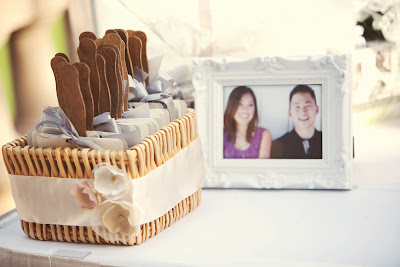
To do this project, I pulled my original program fans from out of storage. The white insert/face of the program has a final dimensions of: 5.0" x 5.25" (when folded, unfolded the size is 5.0" x 10.5"). I made the Dieline to fit a 8.5" x 11" letter size paper, you can download a blank dieline here if you need it. The silver cardstock is 5.5" x 5.5".
With Tiffany's wedding colors of eggplant + fuchsia + cream; I pulled out the stationary supplies of similar colors that matched the best. (In place of my silver cardstock backing, I used a plum purple cardstock cut to 5.5" x 5.5" for Tiffany's fan.
Design your program fan, and print it out. Remember that the dieline I linked, folds in the center, so the front of the program will read top to center, and the back of the fan will read bottom to center.
After your cut your dieline (including a center slit) use a bone folder, fold/crease over the center line.
Use the corner rounder if you decide to. Some fans look better with rounded corners, and some don't. for example for my wedding I preferred rounded corners. But for this wedding program fan, I think I prefer square corners.
I used the left over walnut stained wooden paddle sticks from my wedding. You can find similar sticks here. I stained them when I was planning my wedding by sticking them into floral foam cubes and then I used a paint brush to apply a stain to them. You don't have to do this. But it does add a little something extra, don't you think? Anyways, I would use a glue gun to adhere the paddle stick to the cardstock backing.
Now insert the outer program cover over the fan (inserting through the center). Use glue dots/ or some other form of glue, to the corners of the program cover; make sure that each side is glued and is sturdy enough to be used as a fan.
Lastly, use a hand hole pouch to attached a ribbon to the fan. And now you can admire your hard work!
Happy Crafting!


Where did you get the design for the program? Its perfect! Its what ive been looking for.
ReplyDeleteOh thank you. I had designed it for a friend to match her invitation. You can email me:
ReplyDeleteweddingdaytree [at] gmail.com
if you like for more information. Thanks for browsing :)
The programs look beautiful! What kind of glue did you use to paste both sides to each other?
ReplyDeleteThanks! I just used those little clear glue dots...
ReplyDeleteHi there, I was just curious, but about how much ribbon did you use per fan? These are so cute!
ReplyDeleteI don't see any of the links you mentioned highlighted. Could you repost those?
ReplyDelete