Showing posts with label Baking. Show all posts

Tuesday, February 7

Valentine's Day Brownies

I thought, I might put together a quick and easy Valentines Day treat to inspire you. I really didn't have anytime for baking this weekend, so I took out some brownie mix (from the box) and my heart shaped cake pan and got started on some baking. 


Just for fun, I decided to add a little Rum flavored emulsion (from this post). I added only little bit (1/4 teaspoon - but I think you should add more for flavoring).


After you watch these beauties bake, you can serve them 2 ways.


First way, is to sprinkle a little powdered sugar (use a shifter) on top. I kinda just caked my powdered sugar on. A little too much, but oh well.


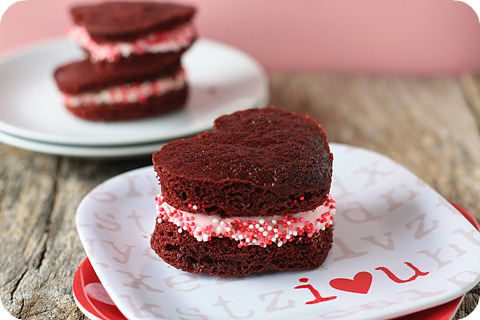
The second way, is to cut the heart shaped brownie in half, and spread some butter cream in the center (to make a brownie sandwich.) I made some Strawberry Butter Cream for this.

Strawberry Butter Cream:
4 oz Unsalted Butter
9 oz Powdered Sugar
3-4 oz Strawberry Jam

Whip butter, add powdered sugar & jam, and whip again.
Yes, its that easy!


(The last photo, I took with my iPhone)

I packaged them with pink cupcake liners, and used my new stamp to mark the cake box. Think about baking these treats for your Valentine as a sweet gesture. This can also be a lovely edition to a bridal shower or any pink themed party. Happy Valentines Day!
Pin It!

Wednesday, February 1

Baking Inspiration


My friend from Traveling Bites, was kind enough to buy me all of these baking emulsions as a gift. If you guys don't know, a emulsions is used in baking for added flavoring, it can also be used to replace the extracts in baking recipes.  It is said "bakery emulsions keep the incorporated flavors more stable while your mixture changes temperature, and they combine more easily with other emulsions (butter, sugar, egg for example) than extracts do" (read more about it here).

This makes me very excited! I can start making all of the desserts of my dreams! how tasty! Here are a few desserts I want to add to my baking calender:

Tiramisu, Source: Knives Cooks Love
Lemon Macarons, Source: Pizzazzerie
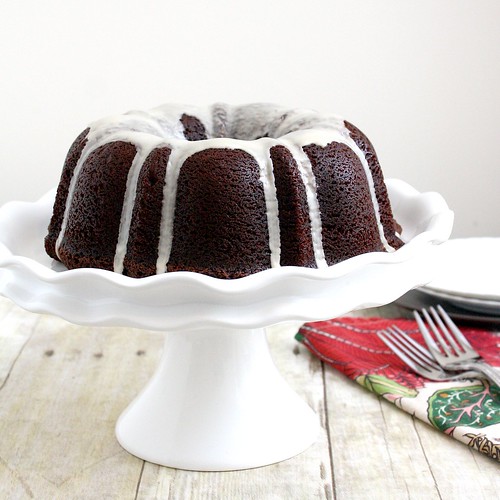
Mocha Rum Bundt Cake, Source: Tracey's Culinary Adventures
Strawberry Almond Bars, Source: Une Gamine Dans la Cuisine

Red Velvet Whoopie Pies, Source: My Baking Addiction
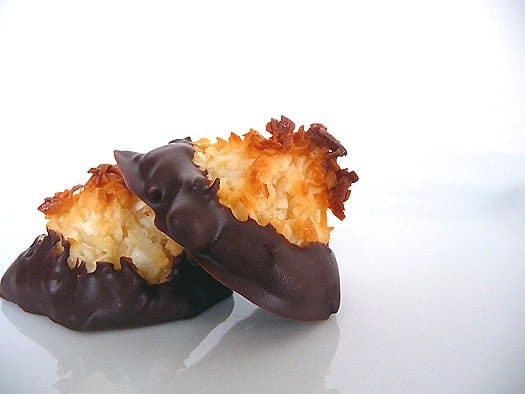
Coconut Macaroons, Source: Brown Eyed Baker
Pin It!

Wednesday, January 25

4 Sisters Bakery


As a gift to my sisters, I made them each a '4 Sisters Bakery' stamp.  Here's the story:

My sisters (I have 3 sisters!) and I love to bake, some of us more then others, but never the less, we love it. My Oldest sister is the best baker ever! We use to say that she should open up a bakery, but it would be way too much work...  During the holidays we all get together and we all bake; years ago, my cousin Danni of Oh Hello Friend had said to us that we should open up a bakery called '4 Sisters Bakery.'

We used our Laser Engraving machine to make the stamps. This will be the only time we will make custom stamps, unless we buy more expensive equipment (and that's going to be a very long time ---- or maybe soon if we win the lottery!) I actually hope we do get the equipment we need someday, because it was just so much fun making my own stamps! Think of all the creative designs I can make?

I designed the stamps for each of my sisters have have. I hope they love them, because it I do.


Recently,  I used the stamp to add label on some oranged flavored madeleines, I  for a neighbor. Cute, right? 
Pin It!

Wednesday, October 19

Sur La Table: Happy Birthday Macarons Lessons


This past Saturday was my 28th birthday. This year I wanted to do something different (and fun!). Something out of the ordinary for me. I decided to take a baking class at Sur La Table! My friends, Rose Marie and Charissa took the class together. Can I just say, it was the  B E S T  D A Y ever! I had so much fun, I think everyone should take this class. I learned so much about baking macarons; one of my favorite cookies ever! It is a must. The class was only $69 and was money well spent. Our head chef was Vanessa, she was great and taught us so many tricks. If you would like to find out what kind of cooking classes your nearby Sur La Table has, click here.


The class had 16 people, of which we split up in groups of 2, to make 1 flavor macaron cookie and 1 filling. I got to make Sesame Macarons (it sounds strange, but it tastes great! I can't wait to make them again! hehe). 

Here are the recipes:

♥  Sesame Macarons  ♥

Yield: 35 Sandwich Cookies

7 ounces powdered sugar, divided
4 ounces almond flour or meal (it is best to use a digital scale to do all measurements)
2 tablespoons sesame seeds, ground fine
2 tablespoon sesame seeds, whole
4 large (4 ounces) egg whites, room temperature -- (no shells or yolks!)
Pinch of cream of tartar (very important)
3 1/2 ounces granulated sugar


Preheat oven to 375 degrees. Prepare parchment paper macaron templates. Line baking sheets with Silpat silicone mats and top with parchment paper templates. (We used a template with a circle of 1.25" diameter. --- But I found these online! I want it!)

Pulse on third of the powdered sugar and all the almond flour in a food processor / blender until a fine powder.  Add ground sesame seeds. Sift mixture 2 times. Sift remaining powdered sugar 2 times. Combine almond flour mixture, remaining powdered sugar and whole sesame seeds. Set aside. (We used a Tamis to sift the almond meal/flour and powdered sugar and sifted 3 times).


In the bowl of a stand mixture fitted with a whisk attachment, whisk egg whites and cream of tartar on a medium speed until foamy. Gradually add granulated sugar. Once all sugar is incorporated, scrape down sides of bowl and increase speed to high, whisking until stiff firm glossy peaks form.


To complete the macaronnage step, sift the almond flour mixture one-third at a time over egg white and fold using a large spatula until mixture is smooth and shiny. (This is where you add food coloring, is you wish, use the good stuff, not the food coloring from the grocery store.)  Once all the almond flour mixture is incorporated, check for the correct consistency - the batter should be nicely firm and drip slowly from the spatula. (When you mix the cookie batter, you have to release some of the air in it - sounds funny, I know - You can do this by smearing the batter on the inside rim of the container. Do this until the cookie batter 'flows like a volcano')


Transfer batter to a pastry bag fitted with a 1/2-inch plain round tip (#12) and pipe 1 1/3inch rounds on parchment-lined baking sheets. Tap bottom of each sheet on work surface to release trapped air. Let stand at room temperature for 15-30 minutes. Check for slight crust to form - macarons should not stick to finger when lightly touched. (The cookie should feel like it has a thin 'shell'.)


Stack the baking sheet with the macarons on top of an empty  baking sheet. Bake one sheet at a time, rotating halfway through, until macarons are crisp and firm, about 10 to 15 mins. If macarons are still soft inside, lower oven to 300 degrees, cover with aluminum foil and bake for a few more minutes.


Let macarons cool on sheets for 2 to 3 minutes and transfer to a wire rack to cool completely before filling.


________________________________________________________________


♥  White Chocolate Ganache 

Yield: 3/4 cup

1/2 cup heavy cream
10 ounces white chocolate, finely chopped (we used white chocolate chips)
3/4 ouncc (1 1/2 tablespoons) unsalted butter, softened


In a small saucepan, heat cream over medium-high heat to a simmer. Place white chocolate in a medium heatproof bowl and pour the hot cream over to the chocolate. Let stand for 1 minute. (A simmer means that the cream had steam and small bubbles on the edge of the pan, it is not a boil.)


Slowly stir chocolate mixture with a rubber spatula to combine. Add butter and whisk mixture until smooth. Let cool, stirring every 10 minutes. Once the ganache cools, pipe between two macarons. (If the chocolate isn't melting, you can melt the chocolate [in a heat safe bowl] over the gas flame stove on a low heat setting.)


These recipes are courtesy of Sur La Table

Pin It!

Thursday, June 23

Very Berry, Strawberry Cupcakes!

Source: Annie's Eats
The last time I visited home, my very talented sister and I baked some very delicious strawberry cupcakes for a nice treat for the family. Of course, I had to slow down the process by making a photo shoot out of it. I did my best to take photos of the step-by-step process, so you can see how easy it is to make these cupcakes. These strawberry cupcakes would make a lovely addition to any wedding extravaganza. (i.e Bridal Shower!) And to answer your first question: Yes, these cupcakes do taste as good as they look! I think they taste rather light, myself. Not like a cupcake, but rather a muffin. I think I can eat 4 of them in 1 seating, they are just so good. Enjoy! (This recipe is from Annie's Eats)

Recipe yields 34 cupcakes

Ingredients:

For the cupcakes:
2¼ cups all-purpose flour
½ cup cake flour
1 tbsp. baking powder
1 tsp. salt
2 sticks (1 cup) unsalted butter, at room temperature
2¼ cups sugar
1½ tsp. vanilla extract
3 large eggs plus 1 large egg white
1 cup milk
2½ cups finely chopped fresh strawberries*

For the frosting:
1½ cups fresh strawberries (8 oz.), rinsed, hulled and coarsely chopped*
4 large egg whites
1¼ cups sugar
3 sticks (1½ cups) unsalted butter, at room temperature


For garnish:
Additional fresh strawberries*

*Note: I buy organic as much as possible regardless, but strawberries are one of the items where 
I really notice a huge difference in taste and color.  I recommend using organic berries if possible for best results.


Directions:
To make the cupcakes, preheat the oven to 350˚ F.  Line cupcake pans with paper liners.  In a medium bowl, combine the all-purpose flour, cake flour, baking powder and salt; whisk to blend. (Sift all ingredients together, into the bowl)


In the bowl of an electric mixer, combine the butter, sugar and vanilla.  Beat on medium-high speed until light and fluffy, about 3 minutes.  Beat in the eggs and egg white one at a time, mixing well after each addition and scraping down the sides of the bowl as needed.  With the mixer on low speed, add the flour mixture in two additions alternating with the milk, mixing each addition just until incorporated.  Gently fold in the chopped strawberries with a spatula. Don't mix! Otherwise it will make the strawberries mushy and get their juice everywhere.


Divide the batter between the paper liners, filling each about ¾-full.  We used a ice cream scooper, its the perfect size and has a easy release button. Bake until light golden and a toothpick inserted in the center comes out clean, about 25-28 minutes, rotating the pans halfway through baking.  Allow to cool in the pans a few minutes, then transfer to a wire rack to cool completely.


To make the frosting, place the strawberries in a food processor or blender.  Puree until completely smooth.  Combine the egg whites and sugar salt in a heatproof bowl set over a pot of simmering water.  Heat, whisking frequently, until the mixture reaches 160° F and the sugar has dissolved.


Transfer the mixture to the bowl of a stand mixer** fitted with the whisk attachment.  Beat on medium-high speed until stiff peaks form and the mixture has cooled to room temperature, about 8 minutes.  (The bowl should be cool to the touch.)


Reduce the speed to medium and add the butter, 2 tablespoons at a time, adding more once each addition has been incorporated.  If the frosting looks soupy or curdled, continue to beat on medium-high speed until thick and smooth again, about 3-5 minutes more (or longer - don’t worry, it will come together!)  Blend in the strawberry puree until smooth and completely incorporated, scraping down the sides of the bowl as needed. 


Fill a pastry bag fitted with a decorative tip with the frosting (We used a large round tip). Frost cooled cupcakes as desired, and garnish with fresh berries or berry slices. We decided not to garnish with strawberries, because they are just for family, but if these for baked for a special event, definitely do so.


**This can theoretically be made using a hand mixer, but will require even more time and a lot of arm strength.
 Original Recipe is from Annie's Eats
Pin It!